インストールされたEnterpriseエージェントの利用前に必要な設定が2つあります。
1. エージェントのWebUIのパスワード変更
2. Enterpriseエージェントを自分のThousandEyesのアカウントに紐付けるトークンの設定
エージェント起動終了後の画面に表示されたURL(例、http://192.168.1.148/.)にWebブラウザーでアクセス
初期設定値 Username: admin Password: welcome

次にパスワードの変更を要求されます。(数字+英大文字+英小文字+記号の混合で8文字以上)

パスワード変更を入力後、[Change Password] を押します。
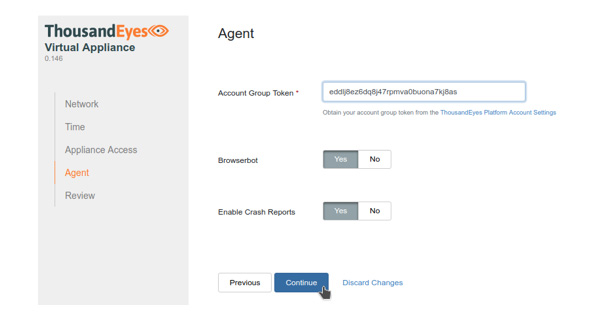
次の画面の Account Group Token に自分のアカウントから発行されるトークンを入力します。
トークンはThousandEyesのクラウドアプリにログインした後、
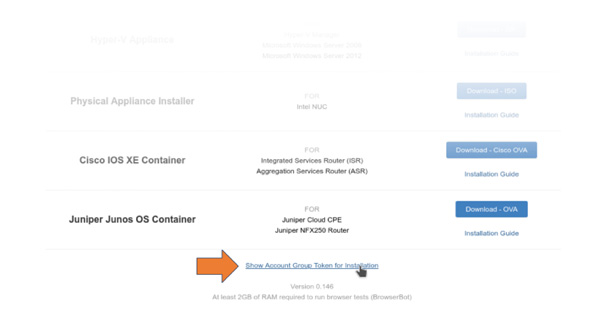
Cloud & Enterprise Agents > Agent Settings > Enterprise Agent ページ内の Add New Enterprise Agent 画面の最下段にあるリンクから取得します。
このトークンをコピーして、ブラウザでアクセしていたエージェントのWebUIにペースト後、[Continue] のボタンを押します。
次に表示される診断画面で全ての項目が緑色の状態であればインストールの完了です。[Complete] を押してWebUIをクローズします。
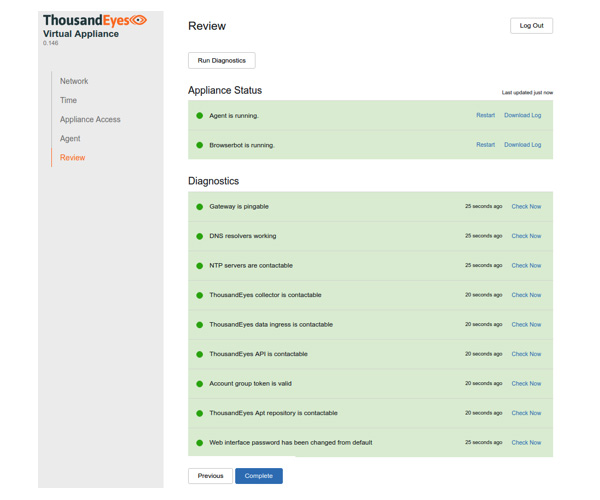
緑色でなく赤い表示の項目がある場合にはトラブルシューティングが必要です。問題が解決できない場合には、ThousandEyesに連絡してください。(japan@thousandeyes.com)
この他にオプションでWebUIから以下の設定変更が可能です。
| ・ホスト名 | ・プロキシサーバー | ・デジタル証明書 |
| ・IPアドレス | ・NTPサーバー | ・エージェントの初期化 |
| ・DNSサーバー | ・ssh のアクセス鍵 | ・etc... |
ThousandEyesのポータルからEnterpriseエージェントを設定
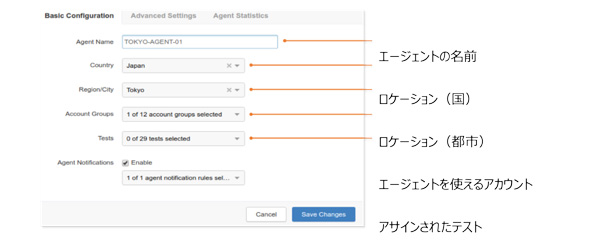
ThousandEyesのポータルサイトの Agent Settings > Enterprise Agent の画面に新しいEnterpriseエージェントの表示を確認後、エージェントの設定をします。

エージェントの設定画面:
この他の設定に関する詳細はオンラインマニュアルをご参考ください:
【注意】なお、Enterpriseエージェントを初期設定時と異なるネットワーク環境に移動すると、エージェントが ThousandEyesのクラウドと通信できなくなることがございます。その際には上記のポータルサイト画面からのエージェント削除ではなく、冒頭のエージェントWebUIの Agentタブをクリックし、Account Group Token下段の To change the account group token for this agent, first reset agent state in the Advanced Settings のリンクをクリックしてください。その後 Advanced Settings -> Agent State -> Reset Agent state からエージェントを初期化、再度トークンを入力してください。
また、一度ポータルサイト画面からエージェントを削除すると自動では再登録されません。上記の操作同様にエージェントのWebUIからトークンの再入力をしてください。
